Discover the world of 3D cutting board plans with detailed PDF downloads and customizable SketchUp files․ Perfect for woodworkers of all skill levels, these plans offer creative designs and step-by-step guidance;
What is a 3D Cutting Board?
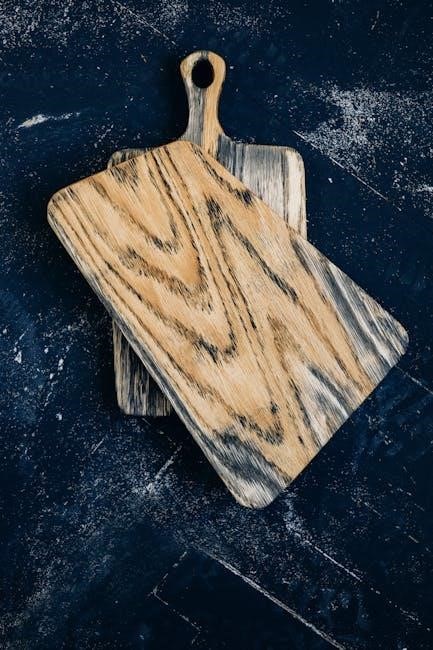
A 3D cutting board is a visually striking kitchen tool that combines functionality with artistic design․ It features a three-dimensional pattern created by arranging wooden strips or panels in a specific layout, often using contrasting wood types for visual appeal․ Unlike traditional flat cutting boards, 3D designs incorporate intricate layers or geometric shapes, making them both functional and decorative․ The process involves precise cuts and assembly to achieve the desired depth and texture․ These boards are popular among woodworkers due to their unique aesthetic and the opportunity to showcase craftsmanship․ They are durable, practical, and often become a focal point in any kitchen, blending usability with creative expression․
Benefits of Using 3D Cutting Board Plans
Using 3D cutting board plans offers numerous benefits, particularly for woodworking enthusiasts․ These plans provide detailed step-by-step instructions, making it easier to create intricate designs with precision․ The ability to download PDF files and customizable SketchUp models allows for flexibility, enabling users to modify designs to suit their preferences․ Additionally, 3D cutting boards add a unique aesthetic to kitchens, combining functionality with artistic appeal․ The plans are suitable for woodworkers of all skill levels, from beginners to experts, and the finished products make excellent gifts or personal projects․ The structured approach ensures a professional finish, while the creative freedom encourages experimentation with different wood types and patterns․ This makes 3D cutting board plans a valuable resource for anyone looking to create something truly special․

Design Considerations for 3D Cutting Boards
When designing a 3D cutting board, consider grain orientation, pattern complexity, and material compatibility․ Proper alignment ensures durability, while creative designs enhance visual appeal and functionality․
Types of Grain: End-Grain, Edge Grain, and Face/Flat Grain
Understanding grain types is crucial for crafting durable 3D cutting boards․ End-grain boards, made from wood ends, are highly resistant to knife marks and wear, making them ideal for professional use․ Edge grain boards, constructed from wood edges, offer good durability and are easier to work with․ Face or flat grain boards, made from wood surfaces, are more budget-friendly but less resistant to wear․ Each grain type impacts the board’s appearance and functionality, allowing woodworkers to choose based on their needs and preferences․ Proper grain alignment ensures longevity and enhances the aesthetic appeal of the cutting board․
3D Pattern Ideas and Design Inspiration
Explore creative 3D pattern ideas for cutting boards, from geometric shapes to intricate designs․ Design inspiration includes diamond-shaped wood inlays, checkerboard layouts, and waffle patterns․ These designs enhance functionality and aesthetic appeal․ Use contrasting wood types to create visual depth, such as combining light and dark hues․ Patterns like squares, triangles, and interlocking shapes add a unique touch․ For advanced projects, consider customizable designs using SketchUp files․ Free PDF plans often feature step-by-step guides for intricate 3D patterns․ Whether you prefer modern or traditional styles, these designs allow for personalization and creativity, making your cutting board a standout piece in any kitchen․
Materials Needed for 3D Cutting Boards
High-quality hardwoods like maple, walnut, or cherry are ideal․ Food-safe adhesives and proper glues ensure strong bonds․ Panel glue-up techniques and clean squeeze-outs are essential for durability and finish․
Wood Selection: Types and Characteristics
Selecting the right wood is crucial for creating durable and visually appealing 3D cutting boards․ Hardwoods like maple, walnut, and cherry are popular choices due to their density and resistance to scratches․ End-grain wood is highly recommended as it offers superior durability and a self-healing property, making it ideal for cutting surfaces․ Edge grain and face/flat grain options are also available, though they may not be as durable․ Consider the color and grain pattern of the wood to achieve the desired aesthetic․ Properly kiln-dried lumber ensures stability and minimizes warping․ Always choose food-safe woods to maintain hygiene and safety for kitchen use․
Adhesives and Glues for Assembly
Choosing the right adhesives is essential for a strong and durable 3D cutting board assembly․ Food-safe wood glues, such as polyurethane-based or epoxy-based adhesives, are ideal for bonding wooden strips and panels․ These glues ensure a tight, moisture-resistant seal, crucial for kitchen use․ Apply adhesives evenly and clamp firmly to avoid gaps․ For intricate 3D patterns, consider using hot glue for precise alignment and quick bonding․ Always follow the manufacturer’s instructions for drying times and clamping pressure․ Properly cleaning up excess glue during assembly ensures a smooth finish․ Using high-quality adhesives guarantees long-lasting performance and a professional-grade cutting board․
Tools Required for Making 3D Cutting Boards
Essential tools include table saws, planers, and sanders for precise cuts, along with chisels, clamps, and marking tools for smooth assembly․
Essential Power Tools: Table Saws, Planers, and Sanders
Creating a 3D cutting board requires precise tools for accurate cuts and smooth finishes․ A table saw is crucial for cutting wooden strips to the desired width and length․ Planers ensure uniform thickness across all strips, essential for a professional finish․ Sanders, both belt and orbital, are vital for smoothing surfaces and preparing the wood for assembly․ These power tools help achieve the precision needed for intricate 3D patterns and ensure the final product is both functional and visually appealing․ Proper use of these tools guarantees clean cuts, even surfaces, and a durable cutting board․ They are indispensable for bringing your 3D cutting board plans to life․
Hand Tools: Chisels, Clamps, and Marking Tools
Hand tools are essential for precision and control when crafting a 3D cutting board․ Chisels are used to fine-tune joints and remove small imperfections, ensuring a snug fit between wooden strips․ Clamps are crucial for holding pieces in place during gluing, preventing misalignment and ensuring even pressure․ Marking tools, such as squares and pencils, help in creating accurate measurements and layouts․ These tools are indispensable for achieving the intricate designs and seamless assembly required in 3D cutting board plans․ Proper use of hand tools ensures that every detail, from the pattern alignment to the final fit, is executed flawlessly, resulting in a professional-quality cutting board․

The 3D Cutting Board Plan
A comprehensive step-by-step guide with detailed drawings, ensuring a smooth workflow․ Includes PDF plans and customizable SketchUp files for personalization, perfect for crafting intricate designs․
Step-by-Step Instructions: From Drawings to Assembly
Start with detailed drawings to visualize your project․ Next, create wooden panels and strips, ensuring precise measurements․ Assemble the pieces following the 3D pattern, using glue and clamps for alignment․ SAND the surface for a smooth finish․ Apply oil or sealant for durability․ These instructions guide you through each stage, from preparation to completion, ensuring a professional result․
Preparation of Wooden Panels and Strips
Begin by cutting wooden panels into strips of varying widths and lengths, depending on your design․ Use a table saw for precise cuts and a planer to ensure even thickness․ Arrange the strips according to your 3D pattern, creating a visually appealing layout․ Sand all pieces to achieve smooth surfaces before assembly․ This step is crucial for ensuring proper alignment and a seamless finish․ Proper preparation guarantees a sturdy and professional-looking cutting board․
Creating the 3D Pattern and Assembling the Board
Arrange wooden strips into your desired 3D pattern, using detailed plans as a guide․ Apply wood glue to the backs of the strips and carefully place them on the base panel․ Use clamps to secure the pieces, ensuring proper alignment and even pressure․ Allow the glue to dry completely before proceeding․ Sand the edges to ensure a smooth transition between strips․ This step requires precision to achieve the desired 3D effect․ Once assembled, let the board sit for 24 hours to ensure the glue sets properly․ This process creates a sturdy and visually striking cutting board with a professional finish․
Final Sanding and Finishing Techniques
Start by sanding the entire cutting board with 120-grit sandpaper, progressing to 220-grit for a smooth finish․ Ensure all edges and corners are rounded for safety and comfort․ Apply a food-safe oil, such as mineral oil or tung oil, evenly across the surface using a clean cloth․ Let it dry completely before applying a second coat․ For added durability, finish with a food-safe wax or sealant․ Avoid using harsh chemicals or silicone-based products․ Regular maintenance with oil will keep the board hydrated and prevent cracking․ Proper finishing enhances the wood’s natural beauty and ensures the board remains functional and long-lasting for years to come․
Assembly Process of the Cutting Board
Assemble the cutting board by gluing and clamping prepared strips, ensuring precise alignment․ Use a press for even pressure and let it dry completely for durability․
Preparing Wooden Strips for the 3D Pattern
Begin by cutting wooden strips according to the design specifications․ Use a table saw or planer to ensure uniform thickness and precise dimensions․ Sand each strip to achieve smooth surfaces, removing any splinters or imperfections․ Organize the strips by size, color, and grain orientation to maintain consistency in the 3D pattern․ For intricate designs, pre-cut strips into smaller segments or angled pieces as required․ Label each strip to match its position in the final assembly, ensuring a seamless workflow during gluing․ Proper preparation of these strips is crucial for achieving a visually striking and durable cutting board․
Gluing and Clamping the Assembly
Apply wood glue evenly to the prepared strips, ensuring proper alignment with the 3D pattern design․ Use clamps to secure the assembly, applying even pressure to prevent warping․ Start by clamping smaller sections, gradually adding more strips while checking for alignment․ Use cauls or protective pads to avoid damaging the wood․ Tighten clamps incrementally, ensuring glue spreads uniformly․ Allow the assembly to dry according to the adhesive’s instructions, typically 24 hours․ Monitor for any gaps or misalignments and adjust clamps as needed․ Proper clamping ensures a sturdy bond and a flat, even surface for the cutting board․
Pressing and Ensuring Proper Alignment
Once glued, use a press or heavy objects to apply consistent pressure across the assembly․ Ensure all strips align perfectly with the 3D pattern․ Check for any gaps or shifts, adjusting clamps as needed․ Use a carpenter’s square to verify alignment․ If using a press, set it to maintain even pressure without over-tightening, which could distort the wood․ Allow the glue to cure fully before handling․ Proper pressing ensures the design remains intact and the cutting board lies flat, essential for both functionality and aesthetics․ This step is crucial for achieving a professional-grade finish and durability in the final product․

Finishing Techniques for 3D Cutting Boards
Properly finishing your 3D cutting board enhances durability and appearance․ Start with thorough sanding to achieve a smooth surface, then apply food-safe oils and sealants for protection․
Sanding: Tips for Smooth Surfaces
Sanding is a critical step in achieving a smooth, professional finish for your 3D cutting board․ Start with coarse-grit sandpaper (80-100 grit) to remove imperfections and gradually progress to finer grits (120-220) for a polished surface․ Always sand in the direction of the wood grain to avoid scratches․ Use a sanding block for even pressure and inspect the board after each grit to ensure all marks are removed․ Avoid over-sanding, as this can create swirls or dips․ Finish with a light hand-sanding using 320-grit paper for a silky texture․ Proper sanding prepares the wood for oiling and sealing, ensuring a durable and food-safe finish․
Oiling and Sealing the Wood for Durability
Oiling and sealing are essential for protecting the wood and ensuring your 3D cutting board is durable and food-safe․ Use food-safe oils like mineral oil or tung oil, applying a thin, even coat with a clean cloth․ Allow the oil to absorb fully before wiping off any excess․ Repeat this process several times, letting the wood dry between coats, to build a protective finish․ For added durability, apply a beeswax or wax-based sealant as a final step․ Regular maintenance with oil will keep the board resistant to moisture and extend its lifespan․ Proper sealing ensures the wood remains hygienic and maintains its vibrant appearance over time․
Advanced Techniques for 3D Cutting Boards
Elevate your craftsmanship with custom patterns and intricate designs․ Modify existing plans or create unique layouts using SketchUp files for personalized 3D cutting boards․
Custom Patterns and Designs
Unleash your creativity with custom patterns and designs for 3D cutting boards; From intricate geometric shapes to personalized motifs, these designs add a unique touch to your project․ Popular patterns include chevron, herringbone, and waffle designs, which can be tailored to suit any style․ Advanced techniques involve layering different wood types to create visually striking contrasts․ SketchUp files allow for precise customization, enabling you to modify dimensions and layouts․ For a professional finish, ensure symmetry and balance in your design․ Experiment with various grain orientations to enhance the visual appeal․ With free PDF downloads and detailed tutorials, crafting a one-of-a-kind cutting board has never been easier․ Achieve a smooth, polished look by carefully aligning strips during assembly․
Modifying Plans for Personalization
Take your 3D cutting board project to the next level by modifying plans to suit your style․ Use SketchUp files to adjust dimensions, patterns, and layouts․ Personalize designs by incorporating engravings, logos, or custom shapes․ Mix different wood species for unique contrasts and visual appeal․ Adjust strip widths or angles to create one-of-a-kind patterns․ For a professional touch, consider adding a handle or non-slip feet․ Ensure proper alignment during assembly and finish with a food-safe oil for durability․ With these tweaks, your cutting board becomes a functional and artistic centerpiece․ Modify plans to reflect your creativity while maintaining the structural integrity of the design․
Finding the Right 3D Cutting Board Plans
Explore a variety of free PDF plans and premium resources for 3D cutting boards․ Download step-by-step tutorials, SketchUp files, and detailed designs to create unique, customizable projects․
Free PDF Downloads and Resources
Access a wide range of free PDF plans for 3D cutting boards, offering detailed step-by-step instructions and drawings․ These resources are perfect for woodworkers of all skill levels, providing creative designs and practical guidance․ Many plans include customizable options, allowing you to modify patterns and dimensions to suit your preferences․ Websites like mtmwood․com and woodworking communities offer downloadable tutorials, SketchUp models, and design ideas․ These free resources often feature high-quality images, graphs, and tips for achieving professional results․ Whether you’re making an end-grain, edge-grain, or face-grain cutting board, these PDFs and online tools will help you bring your project to life with precision and style․
Premium Plans and SketchUp Files
For those seeking advanced customization, premium 3D cutting board plans offer detailed designs and customizable options․ These plans often include both PDF files and original SketchUp models, allowing users to modify dimensions and patterns to suit their preferences․ Premium resources provide intricate designs, such as 3D end-grain patterns, with step-by-step tutorials and high-resolution images․ SketchUp files are particularly valuable for adjusting metric dimensions and exploring complex layouts․ These premium plans cater to professionals and serious hobbyists, ensuring precise and professional results․ They are a worthwhile investment for anyone aiming to create unique, high-quality cutting boards with a personalized touch․
Creating a 3D cutting board is a rewarding project, offering both functionality and artistic expression․ With detailed plans and resources, woodworkers can craft stunning, durable designs they’ll cherish․
Final Thoughts on Making 3D Cutting Boards
Creating a 3D cutting board is a rewarding woodworking project that combines precision, creativity, and functionality․ With detailed PDF plans and customizable SketchUp files, makers can craft unique designs tailored to their skills and preferences․ Whether you’re a novice or an experienced woodworker, these plans provide a clear roadmap to success․ The process involves careful preparation of materials, precise assembly, and attention to finishing details․ Exploring various grain types and patterns allows for personalization, making each board a one-of-a-kind piece․ Resources like Mike Schwing’s tutorials and SawmillCreek․org offer invaluable guidance․ Embrace the journey, experiment with designs, and take pride in creating a functional and beautiful 3D cutting board that will be cherished for years․