
Balsa wood glider plans offer a fun, educational way to explore aerodynamics and engineering. Detailed PDF guides provide easy-to-follow instructions for crafting lightweight, durable aircraft at home.
What Are Balsa Wood Gliders?
Balsa wood gliders are small, lightweight aircraft made entirely from balsa wood, a material known for its exceptional strength-to-weight ratio. These gliders are designed to achieve sustained flight by utilizing the natural properties of balsa wood. They consist of a wingspan, fuselage, and tail section, all crafted from balsa sheets. Balsa gliders are popular among hobbyists and educators due to their simplicity, durability, and ability to teach fundamental aerodynamic principles. They are often used indoors but can also perform well outdoors, making them a versatile and enjoyable project for both kids and adults. Detailed PDF plans guide users through construction and assembly.
Why Choose Balsa Wood for Gliders?
Balsa wood is the preferred choice for gliders due to its unique combination of light weight, high strength, and flexibility. Its low density ensures minimal weight, allowing gliders to achieve longer flight durations with less effort. The wood’s stiffness-to-weight ratio makes it ideal for maintaining structural integrity while keeping the aircraft lightweight. Additionally, balsa wood is easy to cut, shape, and assemble, making it accessible for hobbyists and educational projects. These properties, combined with its cost-effectiveness, make balsa wood an excellent material for constructing durable and high-performing gliders. PDF plans further simplify the process by providing precise templates and instructions for assembly.
Benefits of Using PDF Plans for Balsa Gliders
PDF plans for balsa gliders offer unmatched convenience and precision. They provide detailed, scalable templates that can be easily printed or viewed on digital devices, ensuring accuracy in cutting and assembly. The digital format allows for instant access and sharing, making it ideal for hobbyists and educators. PDF plans often include step-by-step instructions, diagrams, and material lists, simplifying the building process. They also enable easy customization, allowing users to adjust designs to suit their skill levels or preferences. Additionally, PDF plans are cost-effective and environmentally friendly, eliminating the need for physical storage. This makes them a practical and efficient choice for crafting balsa wood gliders.

Understanding Balsa Wood
Balsa wood, scientifically known as Ochroma pyramidale, is a lightweight, fast-growing tree native to Central and South America. Its unique cellular structure makes it incredibly durable yet lightweight, ideal for model crafting.
Properties of Balsa Wood
Balsa wood is renowned for its exceptional lightweight properties, with a density of approximately 0.1–0.2 g/cm³, making it one of the lightest natural woods available. Its unique cellular structure consists of large, thin-walled cells, contributing to its low weight while maintaining strength. Balsa wood exhibits a high stiffness-to-weight ratio, crucial for model gliders as it allows wings to maintain shape under stress. It is also soft and porous, making it easy to cut and shape. The wood’s grain is straight, and it is highly buoyant, adding to its suitability for aerodynamic projects. These properties make balsa wood an ideal material for crafting durable, flight-efficient gliders.
Why Balsa Wood is Ideal for Model Gliders
Balsa wood’s lightweight and high stiffness-to-weight ratio make it perfect for model gliders, ensuring efficient flight performance. Its soft, porous nature allows for easy shaping and assembly, while its buoyancy enhances aerodynamic capabilities. The wood’s natural strength supports wing structures without adding weight, crucial for sustained flight. Additionally, balsa wood is a sustainable and renewable resource, making it an eco-friendly choice. These unique properties, combined with its availability in various densities, provide builders with versatile options for crafting durable and high-performing gliders. Balsa wood’s characteristics make it the go-to material for hobbyists and enthusiasts seeking to create model aircraft that excel in flight dynamics and design.
History of Balsa Wood Gliders
Balsa wood gliders originated in the 1920s-30s, becoming popular for indoor flying competitions. Early designs, like the Simmers Glider, set records for flight duration, inspiring modern enthusiasts.
Early Designs and Their Evolution
Early balsa glider designs, like the Simmers Glider, emerged in the 1930s, emphasizing simplicity and light weight. These models often featured minimal structures, relying on balsa’s natural stiffness for flight. Over time, designs evolved to incorporate better aerodynamics and stability, with innovations like adjustable wing angles and streamlined fuselages. The development of PDF plans made these designs accessible, allowing hobbyists to replicate and improve upon classic models. This evolution laid the groundwork for modern balsa gliders, blending historical techniques with contemporary materials and knowledge to optimize performance and durability.
Modern Applications of Balsa Gliders
Today, balsa wood gliders are popular in hobbyist circles and educational settings, serving as tools for teaching aerodynamics and engineering principles. Modern designs often incorporate advanced techniques, such as adjustable wing angles and lightweight constructions, to enhance performance. Discus launch gliders (DLGs) have gained popularity for their portability and flight efficiency. PDF plans have made these designs widely accessible, allowing enthusiasts to build and customize their own gliders. Additionally, balsa gliders are used in competitions and STEM programs, fostering innovation and creativity. Their simplicity and sustainability continue to make them a beloved choice for both recreation and educational purposes.

How to Choose the Right Balsa Glider Plans
Selecting the right balsa glider plans involves considering skill level, design complexity, and intended use. Choose plans with detailed instructions and suitable materials for a rewarding build experience;
Factors to Consider When Selecting Plans
Choosing the right balsa glider plans involves evaluating skill level, design complexity, and intended use. Ensure the plans include detailed instructions and materials lists. Consider the wingspan and weight for optimal performance. Check for scalability and customization options. Verify the plan’s compatibility with available tools and materials. Assess the level of detail in assembly guides and diagrams. Look for reviews or testimonials from other builders. Ensure the plan aligns with your goals, whether for casual flying or competitive performance. Proper selection guarantees a successful and enjoyable building experience.
Popular Types of Balsa Glider Designs
Balsa wood gliders come in various designs, catering to different skill levels and preferences. Simple gliders are ideal for beginners, offering basic aerodynamics and easy assembly. Discus launch gliders (DLGs) are popular for their high performance and portability, featuring lightweight constructions. Scale models replicate real aircraft, appealing to enthusiasts who appreciate realism. Indoor gliders are designed for smooth flight in confined spaces, while outdoor gliders are built for longer, more robust flights. Each design emphasizes unique aspects, such as durability, maneuverability, or aesthetic appeal, ensuring there’s a glider type for every builder’s goal and experience level.
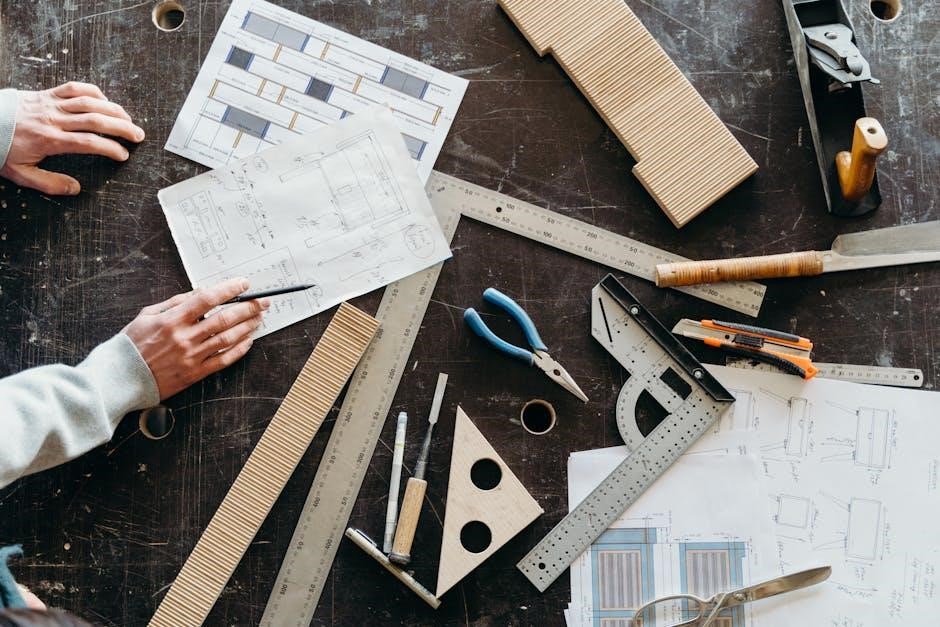
Materials and Tools Required
Balsa wood sheets, carbon rods, glue, sandpaper, hobby knives, rulers, and a stable work surface are essential for constructing a glider from PDF plans.
Essential Materials for Building a Balsa Glider
Building a balsa glider requires lightweight yet durable materials. Balsa wood sheets of varying thicknesses are the primary component, used for wings, fuselage, and control surfaces. Carbon rods or fibers add strength to the structure, particularly in the wing spar for stability. High-quality adhesives, such as cyanoacrylate (CA) glue, ensure a strong and lasting bond between parts. Sandpaper and a hobby knife are essential for shaping and smoothing the wood. A flat work surface and straightedge help in precise cutting and assembly. Additionally, small hardware like hinges and control horns may be needed for more complex designs. Always use materials as specified in the PDF plans for optimal results.
Tools You’ll Need for Assembly
Building a balsa glider requires specific tools for precise assembly. A sharp hobby knife or scalpel is essential for cutting balsa wood accurately; Sandpaper and a sanding block help smooth edges and surfaces. A cutting mat protects your work surface while cutting. Tweezers are useful for handling small parts, while a ruler or straightedge ensures straight cuts. A pencil marks cutting lines clearly. Glue, such as cyanoacrylate (CA) or white glue, is vital for bonding parts. Optional tools include a small clamp to hold parts while drying and a fine file for detailing. These tools ensure a smooth and accurate assembly process, as outlined in most PDF plans.

Step-by-Step Construction Guide
Detailed PDF plans guide you through building a balsa glider, from transferring designs to wood, cutting parts, sanding, and assembling the fuselage, wings, and tail for flight-ready results.
Cutting and Preparing Balsa Wood Parts
Cutting and preparing balsa wood parts is the first step in building your glider. Start by transferring the plans onto the balsa sheets using tracing paper or a photocopied template. Use a sharp knife or scalpel to carefully cut out each part, ensuring smooth edges. Sand all pieces gently to remove splinters and achieve a polished finish. Organize the parts according to the plan, grouping similar components together for easy assembly. This meticulous preparation ensures accurate fitting during the construction phase, laying a solid foundation for a successful build. Proper cutting and sanding are crucial for optimal flight performance.
Assembling the Fuselage and Wings
Assembling the fuselage and wings is a critical step in building your balsa wood glider. Begin by aligning the fuselage parts according to the plan, ensuring accurate fits. Use a small amount of glue to secure the sides and bottom, forming the body structure. Once dry, attach the wings by carefully aligning the wing roots with the fuselage. Secure them with glue, ensuring proper alignment for balanced flight. Use pins or weights to hold parts in place while drying. Double-check the wing angle and fuselage straightness to avoid asymmetry. This step requires patience and precision to achieve a sturdy, aerodynamic structure for optimal flight performance.
Adding the Tail Section
Adding the tail section is the final structural step in your balsa wood glider assembly. Start by preparing the tail components, including the stabilizer and fin. Carefully align the stabilizer with the rear of the fuselage, ensuring it is straight and level. Attach it using a small amount of glue, holding it firmly until set. Next, position the vertical fin centrally on the stabilizer, securing it with glue. Allow the adhesive to dry completely to ensure a strong bond. Proper alignment of the tail section is crucial for stability and control during flight. Once attached, your glider is ready for final sanding and testing.
Tips for Improved Performance
Optimize wing curvature for better lift and stability. Use lightweight materials to minimize weight. Ensure precise alignment of wings and tail for balanced flight performance.
Optimizing Wing Design for Better Lift
Optimizing wing design is crucial for maximizing lift in balsa wood gliders. A well-crafted wing with a curved upper surface and flatter lower surface enhances airflow, generating lift efficiently. Ensuring the wing’s camber and chord are proportionate to the glider’s size is key. Smoothing the wing surfaces and aligning them properly with the fuselage reduces drag. Additionally, reinforcing the wing structure with lightweight materials, like carbon rods, can improve durability without compromising performance. Proper sanding and shaping of the balsa wood ensure a smooth, aerodynamic profile, which is essential for achieving longer and more stable flights.
Weight Management for Longer Flights
Weight management is vital for achieving longer flights with balsa wood gliders. Lighter gliders stay airborne longer due to reduced drag and higher buoyancy. Using thin, high-quality balsa wood and minimizing unnecessary components helps keep the weight down. Strategic placement of reinforcements ensures strength without adding excess mass. Sanding all parts to a smooth finish reduces air resistance. Small adjustments, like using lighter adhesives or optimizing the tail design, can also make a significant difference. A balanced approach between durability and weight ensures optimal performance, allowing your glider to soar for extended periods.
Common Mistakes to Avoid
Common mistakes include improper wing alignment, over-sanding, and using excessive glue, which can add unnecessary weight and disrupt the glider’s balance, affecting flight performance.
Errors That Can Affect Flight Performance
Common errors in building balsa wood gliders include improper wing alignment, which disrupts lift, and uneven weight distribution, leading to unstable flights. Over-sanding or cutting parts inaccurately can weaken the structure, reducing durability. Additionally, using excess glue adds weight, negatively impacting performance. Incorrectly assembling the tail section can cause poor control and direction. Ensuring precise cuts, balanced weight, and proper alignment is crucial for optimal flight. Following PDF plans carefully and avoiding rushed assembly helps minimize these issues, ensuring a glider that flies smoothly and lasts longer.
How to Troubleshoot Issues
If your balsa wood glider isn’t performing well, start by inspecting the wings for proper alignment and curvature, as misalignment can reduce lift. Check the tail section for straightness and ensure it’s securely attached. Balance the glider by adjusting weights, as a tail-heavy model may stall. Sand rough edges to improve airflow and reduce drag. Test different throwing techniques to find the optimal launch angle. Review your PDF plans to verify all parts were cut and assembled correctly. Make adjustments incrementally, testing each change to isolate and fix the issue effectively. Patience and attention to detail are key to achieving better flight performance.
Building a balsa wood glider is a rewarding project that combines creativity with engineering. With patience and practice, you’ll enjoy the thrill of flight and the satisfaction of crafting your own aircraft.
Final Thoughts on Building Balsa Gliders
Building a balsa wood glider is a rewarding and educational experience that combines creativity with engineering principles. It teaches patience, precision, and problem-solving skills while fostering a deeper appreciation for aerodynamics. Whether you’re a hobbyist or a student, balsa gliders offer a fun and accessible way to explore the basics of flight. With detailed PDF plans, you can craft a lightweight, durable aircraft that soars gracefully. The process of designing and assembling your glider is as satisfying as the thrill of watching it fly. It’s a project that connects you to the fundamentals of aviation while providing endless hours of enjoyment and learning.