Welcome to the MHK2 Installation Manual. This guide provides detailed instructions for installing and configuring the MHK2 Remote Controller with Mitsubishi Electric indoor units. Ensure safety by disconnecting power before starting, and follow all steps carefully to avoid damage or hazards. This manual is intended for trained technicians and experienced installers.
1.1 Overview of the MHK2 Installation Manual
This manual provides a comprehensive guide for installing and configuring the MHK2 Remote Controller with Mitsubishi Electric indoor units. It outlines essential steps, safety precautions, and technical requirements to ensure a successful setup. The document is designed for trained technicians and experienced installers, offering detailed instructions to avoid equipment damage or safety hazards. Key topics include disconnecting power before installation, attaching the cable to the CN105 connector, and linking the controller to Mitsubishi Electric systems. The manual also covers troubleshooting and maintenance tips to ensure optimal performance. By following this guide, installers can seamlessly integrate the MHK2 controller with compatible systems for efficient operation.
1.2 Importance of Following the Manual
Adhering to the MHK2 Installation Manual is crucial for ensuring a safe and successful installation. Failure to follow instructions can result in electrical shock, equipment damage, or system malfunctions. Proper procedures guarantee compatibility with Mitsubishi Electric indoor units and maintain warranty validity. The manual provides clear, step-by-step guidance to avoid potential hazards and ensure optimal performance. Deviating from the instructions can lead to improper configurations, affecting the controller’s functionality. Always prioritize safety and system integrity by strictly following the guidelines outlined in this manual. This ensures reliability, efficiency, and compliance with manufacturer recommendations for the MHK2 Remote Controller setup and operation.
1.3 Target Audience
This manual is specifically designed for trained and experienced technicians, HVAC professionals, and system integrators responsible for installing and configuring the MHK2 Remote Controller. It is intended for individuals with a strong understanding of electrical systems and Mitsubishi Electric indoor units. The guide assumes a level of technical expertise, as improper installation can lead to safety hazards or system malfunctions. HVAC technicians and installers will find detailed instructions for integrating the MHK2 with existing systems, while system integrators will benefit from configuration guidelines for advanced functionality. This manual ensures that professionals can safely and effectively install the MHK2, maintaining system performance and reliability.
System Requirements
The MHK2 Remote Controller is compatible with Mitsubishi Electric indoor units and requires specific tools and materials for installation, as detailed in the manual.
2.1 Compatibility with Mitsubishi Electric Indoor Units
The MHK2 Remote Controller is specifically designed to integrate seamlessly with Mitsubishi Electric indoor units, ensuring optimal performance and compatibility. This compatibility ensures that the remote controller can effectively manage and regulate the indoor units’ operations, providing precise temperature control and enhancing overall system efficiency. Proper installation and configuration, as outlined in the MHK2 Installation Manual, are essential to maintain this compatibility and ensure that all features function as intended. Always verify compatibility before installation to avoid any potential issues or malfunctions. This ensures a smooth operational experience and maximizes the benefits of the system.
2.2 Necessary Tools and Materials
To ensure a successful installation of the MHK2 Controller Kit, gather the following tools and materials: a flathead screwdriver, Phillips screwdriver, pliers, and wire strippers for cable preparation. Additionally, a voltage tester is recommended to confirm power disconnection. For mounting, you will need screws, wall anchors, and brackets suitable for your installation site. Ensure the CN105 connector cable is compatible with your Mitsubishi Electric indoor unit. Cable ties and adhesive pads may also be useful for organizing wires and securing components. Optional tools include a ladder or step stool for elevated installations. Always use tools and materials appropriate for the task to avoid damage or safety risks.

Safety Precautions
Always disconnect power before installation to prevent electrical shock. Only trained technicians should install. Follow instructions carefully to avoid equipment damage or hazardous conditions. Ensure safety at all times.
3.1 Disconnecting Power Before Installation
Disconnecting power before installation is critical to ensure safety and prevent electrical shock or equipment damage. Locate the power source connected to the indoor unit and switch it off. Verify that the power is completely off using a voltage tester. Never attempt to install or handle electrical components while the system is powered on. Failure to disconnect power can result in serious injury or damage to the MHK2 controller and other system components. Always follow this precaution before starting any installation or maintenance tasks. This step is non-negotiable for a safe and successful installation process.
3.2 Avoiding Electrical Shock or Equipment Damage
To avoid electrical shock or equipment damage, always disconnect power before handling any electrical components. Use a voltage tester to confirm the system is de-energized. Never touch live wires or components with bare hands or improper tools. Ensure the system is grounded correctly to prevent unexpected power surges. Failure to follow these precautions can result in severe injury, equipment malfunction, or costly repairs. Always adhere to safety guidelines and manufacturer instructions when working with electrical systems. Proper precautions ensure a safe installation process and maintain the integrity of the MHK2 controller and connected devices.

Unboxing and Inventory
Carefully unbox the MHK2 Controller Kit and verify all components against the included inventory list. Ensure the wireless receiver, remote controller, and necessary cables are present and undamaged. This step ensures a smooth installation process and confirms that all required parts are available before proceeding.
4.1 Components Included in the MHK2 Controller Kit
Upon unboxing, the MHK2 Controller Kit contains essential components for installation. These include the wireless receiver, remote controller, connection cable for the CN105 connector, and mounting hardware. Additionally, the kit provides an installation guide and any necessary adapters. Ensure all items are present and undamaged. The wireless receiver is crucial for communication between the remote controller and the indoor unit, while the remote controller itself enables user operation. The mounting hardware facilitates secure installation, and the cable ensures proper connectivity. Verify each component against the provided inventory list to confirm completeness before proceeding with installation.
4.2 Verifying All Parts Are Present
Before proceeding with the installation, carefully inspect the contents of the MHK2 Controller Kit. Cross-reference the components with the provided inventory list to ensure all items are included and undamaged. Verify the presence of the wireless receiver, remote controller, connection cable for the CN105 connector, and mounting hardware. Additionally, check for any adapters or accessories specified in the manual. If any components are missing or damaged, contact Mitsubishi Electric support immediately. Proper verification ensures a smooth installation process and prevents potential issues. Failure to confirm all parts are present may lead to installation delays or incomplete setup.

Installation Steps
Begin by disconnecting power, then attach the cable to the CN105 connector. Mount the wireless receiver and install the remote controller, following the manual’s detailed instructions.
5.1 Preparing the Site for Installation
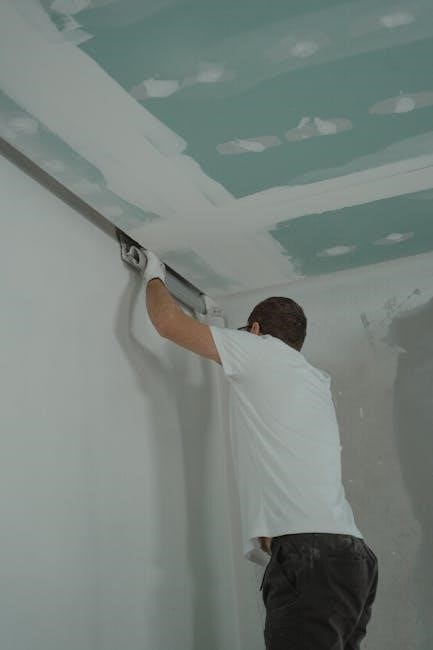
Before starting the installation, ensure the site is prepared. Disconnect power to the indoor unit to prevent electrical shock or damage. Clear the area of obstructions and gather all necessary tools and materials. Verify compatibility with Mitsubishi Electric indoor units and ensure the wireless receiver location is optimal for signal strength; Read the manual thoroughly and follow safety guidelines. Only trained technicians should perform the installation. Ensure the indoor unit is powered down and the system is ready for integration with the MHK2 controller. Double-check all components and ensure the site meets all specified requirements for a safe and successful installation process.
5.2 Mounting the Wireless Receiver
To mount the wireless receiver, choose a location with optimal signal strength and minimal interference. Ensure the area is dry and free from obstructions. Use the provided mounting hardware to secure the receiver firmly to the wall or surface. Align the receiver correctly and tighten the screws to prevent movement. Do not mount the receiver near metal objects or other wireless devices that may cause interference. After mounting, connect the receiver to the indoor unit’s CN105 connector as specified in the manual. Ensure all connections are secure to maintain proper communication between the receiver and the remote controller. Follow the installation guide for precise alignment and connection details to ensure reliable operation. Proper installation ensures optimal performance and signal strength for the MHK2 system.
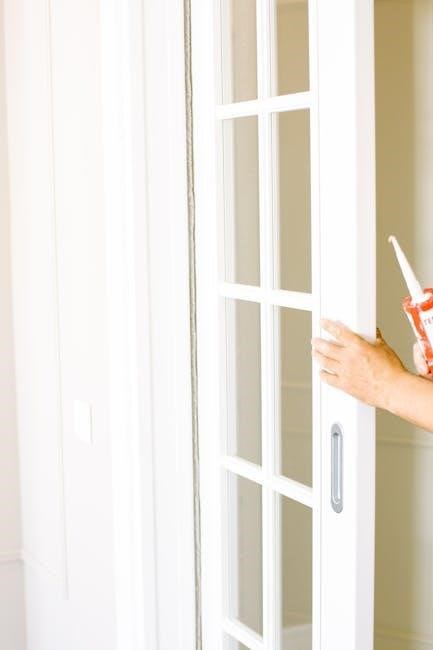
5.3 Connecting the Cable to the CN105 Connector
Locate the CN105 connector on the indoor unit’s control board and ensure it is accessible. Carefully remove any protective covering from the cable connector. Align the cable connector with the CN105 port, ensuring proper orientation to avoid damage. Gently insert the connector into the CN105 port until it clicks securely into place. Do not force the connection, as this may damage the connector or the control board. Once connected, verify that the cable is firmly secured and not loose. Avoid bending or pinching the cable, as this could disrupt communication between the wireless receiver and the remote controller. Ensure all connections are tight before proceeding to the next step. This ensures reliable communication and proper system operation.
5.4 Installing the Remote Controller
Mount the remote controller in a visible and accessible location, ensuring it is level and secure. Peel the adhesive backing from the remote controller’s mounting plate and press it firmly onto the chosen surface. Connect the cable from the remote controller to the CN105 connector on the indoor unit’s control board, ensuring a secure and tight connection. Avoid twisting or pinching the cable during installation. Once connected, power on the indoor unit and test the remote controller to ensure proper communication with the wireless receiver. If the remote does not respond, check the cable connections and ensure the receiver is properly paired. Proceed to the next section for initial setup and configuration.
5.5 Initial Setup and Configuration
After installing the remote controller, turn on the power to the indoor unit. Access the remote controller’s setup menu by pressing and holding the Menu button until the display shows the setup options. Navigate through the menu to configure settings such as temperature range, operation mode, and fan speed. Pair the remote controller with the wireless receiver by following the on-screen instructions or referring to the pairing procedure outlined in this manual. Test all functionality, including heating, cooling, and fan operations, to ensure proper communication between the remote and the indoor unit. If issues arise, consult the troubleshooting section or contact a trained technician. Ensure all settings are saved before exiting the setup menu.
Configuration and Programming
This section covers advanced settings for customizing the MHK2 system. Configure wireless connections, set temperature thresholds, and program schedules. Ensure proper communication between components for optimal performance.
6.1 Setting Up the Remote Controller
Start by pairing the MHK2 remote controller with the wireless receiver. Ensure the receiver is properly connected to the indoor unit. Power on the system and verify the LED indicators light up. Mount the remote controller in an accessible location, ideally 1.2 to 1.5 meters above the floor for optimal signal strength. Use the provided screws or adhesive strips for secure installation. Once mounted, synchronize the remote with the receiver by pressing and holding the “SET” button until the LED flashes. Configure the desired settings, such as temperature range, fan speed, and operation mode. Test all buttons to ensure proper functionality and adjust as needed.
6.2 Configuring the Wireless Connection
To configure the wireless connection, ensure the MHK2 remote controller and receiver are paired. Power on the system and check for a stable signal between the devices. Verify the LED on the receiver indicates a successful connection. If pairing fails, reset the receiver by pressing and holding the reset button for 5 seconds, then repeat the pairing process. Ensure no physical obstructions are blocking the signal path. Test the remote controller from different locations to confirm reliable operation; If issues persist, consult the troubleshooting section or refer to the MHK2 Installation Manual for advanced configuration options. Proper wireless setup is crucial for seamless system control.
Integration with Other Systems
Integrate the MHK2 with RedLINK wireless sensors for enhanced system control. Link it to the Kumo Cloud WI2 interface for seamless remote management capabilities. Refer to the installation manual for specific setup instructions.
7.1 Connecting to RedLINK Wireless Indoor Air Sensors
To connect the MHK2 controller to RedLINK wireless sensors, ensure both devices are powered and within range. Open the MHK2 configuration menu and select “Add Sensor.” Follow on-screen instructions to pair the sensor with the controller. Once paired, the MHK2 will automatically detect and synchronize with the sensor, enabling temperature and humidity monitoring. Verify connectivity by checking the sensor’s status in the controller’s interface. If pairing fails, restart both devices and retry the process. Refer to the MHK2 installation manual for detailed pairing instructions and troubleshooting tips if issues arise.
7.2 Linking to the Kumo Cloud Wireless Interface 2 (WI2)
To link the MHK2 controller to the Kumo Cloud Wireless Interface 2 (WI2), first ensure the WI2 is properly set up and connected to your network. Access the WI2 web interface and navigate to the device registration section. Enter the MHK2 controller’s unique ID to establish a connection. Once registered, the MHK2 will synchronize with the WI2, enabling remote control and monitoring via the Kumo Cloud app. Ensure both devices are on the same network for seamless communication. Refer to the WI2 installation manual for detailed registration steps. This integration allows users to manage their HVAC system remotely through the Kumo Cloud platform.
Troubleshooting
This section addresses common issues during MHK2 installation, such as connection problems or remote control malfunctions. Check power supply, wiring, and signal strength. Consult the manual or contact Mitsubishi support for unresolved issues.
8.1 Common Issues During Installation
Common issues during MHK2 installation include power connectivity problems, incorrect wiring, and signal interference. Ensure the CN105 connector is securely attached and power is disconnected before starting. Verify all components are included and undamaged. Remote controller pairing failures may occur due to insufficient signal strength or incorrect setup. Check for firmware updates and ensure the system is compatible with Mitsubishi Electric indoor units. Refer to the manual for troubleshooting steps and consult Mitsubishi support if issues persist.
8.2 Resolving Connection Problems
Connection issues with the MHK2 can often be resolved by checking wiring and ensuring proper power supply. Verify the CN105 connector is securely attached and power is restored. Reset the system by disconnecting and reconnecting the power supply. Ensure the remote controller is paired correctly and signal strength is adequate. Check for firmware updates and install the latest version. If issues persist, consult the MHK2 Installation Manual or contact Mitsubishi Electric support for assistance. Always follow safety guidelines and manufacturer recommendations when troubleshooting. Properly addressing connection problems ensures optimal performance and functionality of the MHK2 system.
Maintenance and Updates
Regularly check for firmware updates to ensure optimal performance. Clean components and verify connections to maintain functionality. Schedule periodic inspections to prevent issues and extend system lifespan.
9.1 Regular Maintenance Tips
To ensure the MHK2 controller operates efficiently, perform regular maintenance. Clean the remote controller and receiver with a soft cloth to remove dust and debris. Check all connections, including the CN105 connector, to ensure they are secure and free from corrosion. Inspect the wireless signal strength to maintain reliable communication between components. Replace batteries in the remote control as needed to prevent interruption. Schedule annual professional inspections to identify potential issues early. Keep the system firmware updated to access new features and improvements. Regular maintenance helps extend the lifespan and performance of the MHK2 controller.
9.2 Updating Firmware or Software
Regular firmware and software updates are essential to ensure optimal performance of the MHK2 controller. Check the Mitsubishi Electric website or the Kumo Cloud app for the latest updates. Download the update file and follow the instructions provided in the update guide. Connect the controller to a computer or use the wireless interface to apply the update. Do not interrupt the update process to avoid system corruption. After completion, restart the system to ensure the new firmware is fully integrated. Verify the update by checking the version number in the controller settings. Keeping the firmware updated ensures compatibility, enhances functionality, and resolves any known issues.
After completing the installation, perform final checks to ensure proper functionality. Regular maintenance and updates will ensure optimal performance and longevity of the MHK2 system.
10.1 Final Checks and Testing
After completing the installation, perform a thorough system check to ensure all components function correctly. Verify the remote controller operates smoothly, and the wireless connection is stable. Test temperature adjustments, sensor integration, and system responses. Ensure proper communication between the MHK2 and indoor units. Review all settings to confirm they match the desired configuration. Power cycle the system to verify consistent performance. If issues arise, consult the troubleshooting section or contact Mitsubishi Electric support; Final testing confirms a successful installation, ensuring reliability and efficiency for future operation.
10.2 Ensuring Optimal Performance
Regular maintenance is crucial to sustain the MHK2 system’s efficiency. Clean sensors and ensure all connections are secure. Schedule periodic checks to verify proper operation. Update firmware or software as needed to maintain functionality and security. Refer to the installation manual for specific maintenance guidelines. Perform routine testing of remote controller responsiveness and wireless signal strength. Address any issues promptly to prevent system downtime. Ensure all settings align with the intended use case for optimal performance. For further assistance, consult Mitsubishi Electric support or certified technicians. Consistent upkeep guarantees reliable operation and extends the system’s lifespan.