Safety Instructions
Always read the manual carefully before use. Keep children away from the machine. Ensure the machine is placed on a stable surface. Disconnect power when threading or adjusting needles.
1.1. General Safety Precautions
Always read and follow the safety instructions provided in the Singer 5050C manual. Ensure the machine is placed on a stable, flat surface to prevent accidents. Keep children and pets away while operating the machine. Avoid wearing loose clothing or jewelry that could get caught in moving parts. Disconnect the power cord when threading, adjusting, or cleaning the machine. Use the correct tools and accessories recommended by Singer to avoid damage or injury. Never touch electrical components with wet hands or while standing on a damp surface. Ensure proper ventilation in the workspace to avoid inhalation of dust or lint. Keep flammable materials away from the machine. Regularly inspect the power cord and plug for damage. Follow all warnings and cautions provided in the manual to ensure safe operation. Proper maintenance and adherence to these precautions will help prevent accidents and prolong the machine’s lifespan.
1.2. Handling the Sewing Machine Needle
Handle the sewing machine needle with extreme care to avoid injury. Always turn off and unplug the machine before changing or adjusting the needle. Use a needle screwdriver or the tool provided to remove or tighten the needle. Never touch the needle tip with your fingers, as it may cause pricking. Keep needles away from children and pets. Use the correct type and size of needle for your fabric to prevent breakage. If a needle breaks, stop the machine immediately and carefully remove the broken pieces. Avoid pulling or pushing fabric forcefully, as this can cause the needle to deflect and break. Always store needles in a protective case when not in use. Dispose of broken needles safely to prevent accidents. Following these precautions ensures safe handling and reduces the risk of injury while operating the Singer 5050C sewing machine.

Understanding the Singer 5050C Sewing Machine
The Singer 5050C is a versatile and reliable mechanical sewing machine designed for both beginners and experienced sewers. It offers ease of use, durability, and a range of features for various sewing tasks.
2.1. Identifying Machine Parts
The Singer 5050C sewing machine features several key components essential for its operation. The needle is a crucial part used for stitching, while the presser foot holds the fabric in place during sewing. The spool pins are used for winding bobbin thread, and the stitch selector allows you to choose from various stitch patterns. The handwheel is used to manually raise or lower the needle, and the bobbin case holds the bobbin in place underneath the machine. Other notable parts include the thread take-up lever, which regulates thread tension, and the reverse stitch lever, used for reinforcing seams. Understanding these components is vital for proper machine operation. Refer to the manual for a detailed diagram and descriptions to ensure accurate identification and use of each part.
2.2. Key Features of the Singer 5050C
The Singer 5050C sewing machine is designed for versatility and ease of use, making it ideal for both beginners and experienced sewers. It offers a range of features such as 23 built-in stitch patterns, including basic, decorative, and stretch stitches. The machine also includes an automatic needle threader, which simplifies the threading process. Additionally, it has a free arm design, allowing for easy sewing of cuffs, sleeves, and other hard-to-reach areas. The 5050C comes with a variety of presser feet, including a zipper foot, buttonhole foot, and zigzag foot, enabling a wide range of sewing tasks. Its sturdy construction ensures durability, and the adjustable stitch length and width provide precise control over sewing projects. These features make the Singer 5050C a reliable choice for handling lightweight to medium-weight fabrics efficiently.

Operating the Sewing Machine
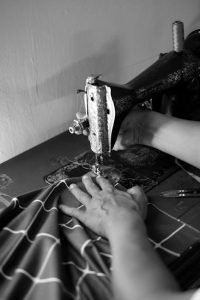
Plug in the machine, turn it on, and select the desired stitch. Guide fabric smoothly under the needle, using the foot pedal to control speed. Always maintain proper tension and alignment for consistent stitching.
3.1. Connecting and Running the Machine
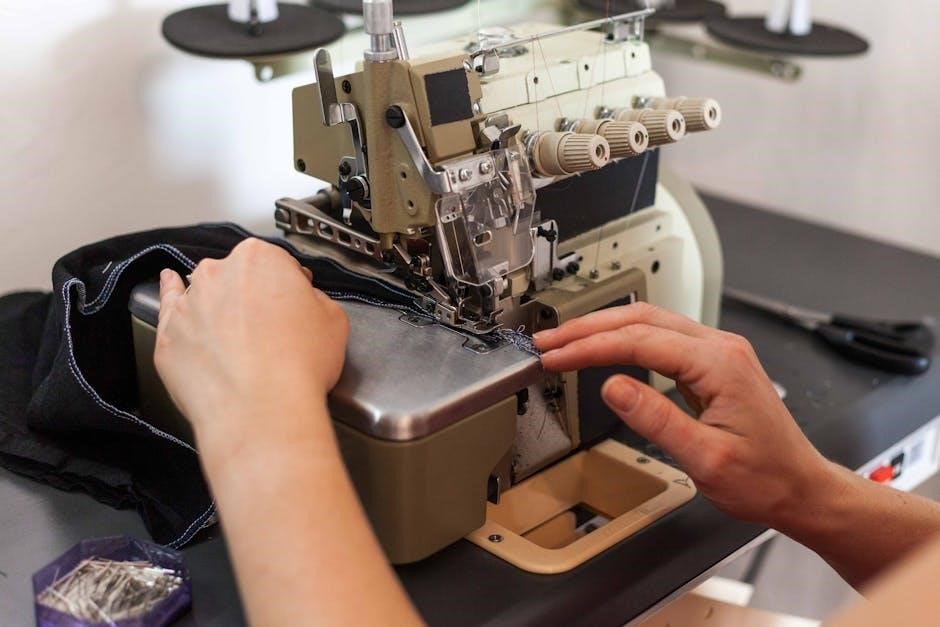
To connect the Singer 5050C, ensure the machine is placed on a stable, flat surface. Plug the power cord into a nearby electrical outlet. Turn on the power switch located on the right side of the machine. Before sewing, test the machine by running it without fabric to ensure it operates smoothly. Use the foot pedal to control the sewing speed, applying gentle to moderate pressure as needed. Always guide the fabric with both hands, keeping it aligned with the edge of the presser foot. If the machine does not start, check that the power cord is securely connected and the switch is in the “on” position. For troubleshooting, refer to the maintenance section. Proper connection and operation ensure safe and efficient sewing experiences.
3.2. Threading the Machine
Proper threading is essential for smooth operation. Begin by turning off the machine and ensuring the presser foot is raised. Locate the spool pin and guide the thread through the tension discs, ensuring it clicks into place. Gently pull the thread to confirm proper tension. Next, pass the thread through the take-up lever, moving it upwards. Do not pull too tightly, as this may misalign the thread. Insert the thread into the needle, leaving a small loop at the end. Trim any excess thread with scissors. Always refer to the manual for detailed diagrams to ensure correct threading. Proper threading ensures consistent stitch quality and prevents issues like skipped stitches or thread breakage. If threading is unclear, consult the instruction manual for step-by-step guidance. Correct threading is key to achieving professional results with your Singer 5050C sewing machine.
Threading the Singer 5050C sewing machine requires attention to detail to ensure smooth operation. Begin by turning off the machine and raising the presser foot. Locate the spool pin and guide the thread through the tension discs, ensuring it clicks into place. Gently pull the thread to confirm proper tension. Next, pass the thread through the take-up lever, moving it upwards. Do not pull too tightly, as this may misalign the thread. Insert the thread into the needle, leaving a small loop at the end. Trim any excess thread with scissors. Always refer to the manual for detailed diagrams to ensure correct threading. Proper threading ensures consistent stitch quality and prevents issues like skipped stitches or thread breakage. If threading is unclear, consult the instruction manual for step-by-step guidance. Correct threading is key to achieving professional results with your Singer 5050C sewing machine.
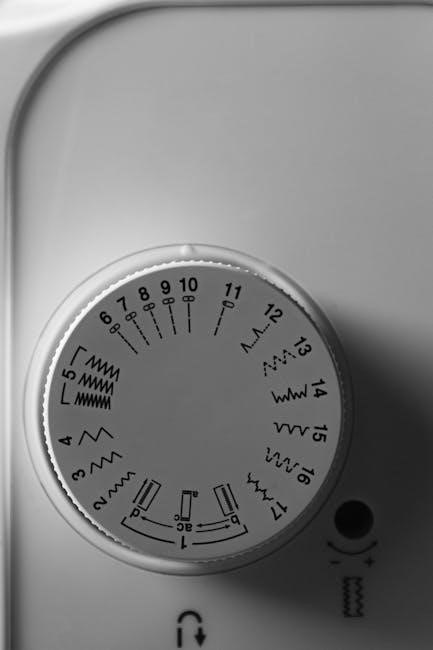
3.3. Basic Sewing Functions
Mastering basic sewing functions on the Singer 5050C is essential for achieving professional results. Start by selecting the appropriate stitch pattern for your fabric type using the stitch selector dial. Adjust the stitch length and width as needed for different materials. Use the reverse stitch lever to reinforce seams at the beginning and end of your stitching. Maintain a steady sewing speed by controlling the foot pedal, ensuring even stitch formation. For beginners, start with a slower speed to gain control. Always keep fabric aligned with the edge guides or markings on the machine. The Singer 5050C handles lightweight to medium-weight fabrics effortlessly, making it ideal for everyday sewing tasks. By practicing these basic functions, you can confidently tackle various sewing projects, from simple repairs to creating custom garments.

Maintenance and Troubleshooting
Ensure regular lubrication of moving parts and check for loose screws. Store the machine in a dry place to prevent rust formation. Refer to the manual for specific troubleshooting steps.
4.1. Cleaning the Machine
Regular cleaning is essential to maintain the performance and longevity of your Singer 5050C sewing machine. Start by disconnecting the power cord to ensure safety. Use a soft, dry brush to remove lint, dust, and debris from the bobbin area, tension discs, and stitch plate. Avoid using harsh chemicals or abrasive materials, as they may damage the machine’s finish. For stubborn lint, a small, clean paintbrush can be effective. After cleaning, wipe the exterior with a damp cloth, but avoid moisture near electrical components. Proper maintenance prevents dust buildup and ensures smooth operation. Always refer to the manual for specific cleaning instructions tailored to your machine.
4.2. Common Issues and Solutions
Like any sewing machine, the Singer 5050C may encounter occasional issues; Skipped stitches can occur due to incorrect needle size, improper thread tension, or dull needles. To resolve this, ensure the needle is sharp and appropriately sized for the fabric. Thread bunching under the fabric often results from incorrect bobbin installation or insufficient tension. Check the bobbin for proper seating and adjust the tension discs as needed. Fabric not moving smoothly may indicate a faulty presser foot or incorrect pressure settings. Adjust the presser foot pressure or switch to a suitable presser foot for your fabric type. If the machine jams, turn it off, remove the fabric, and gently clear any thread tangles. Always refer to the manual for troubleshooting specific to the Singer 5050C. Regular maintenance and proper thread guidance can prevent many of these issues, ensuring smooth and efficient sewing.
Advanced Techniques
Master advanced sewing techniques with the Singer 5050C. Explore stitch customization, needle selection, and presser foot usage for intricate designs. These features enhance versatility and deliver professional-grade results for experienced sewers.
5.1. Choosing and Changing Needles
Choosing the right needle for your Singer 5050C is crucial for optimal performance. Select needles based on fabric type—sharp for woven fabrics, blunt for knits. To change the needle, turn off the machine and unplug it for safety. Gently pull the old needle downward, then insert the new one, ensuring it clicks securely. Align the needle’s flat side with the machine’s needle bar. Tighten the needle clamp firmly. Always use Singer-compatible needles to maintain quality and prevent damage. Regularly inspect needles for wear and replace them every 8-10 hours of use to avoid skipped stitches or fabric damage.
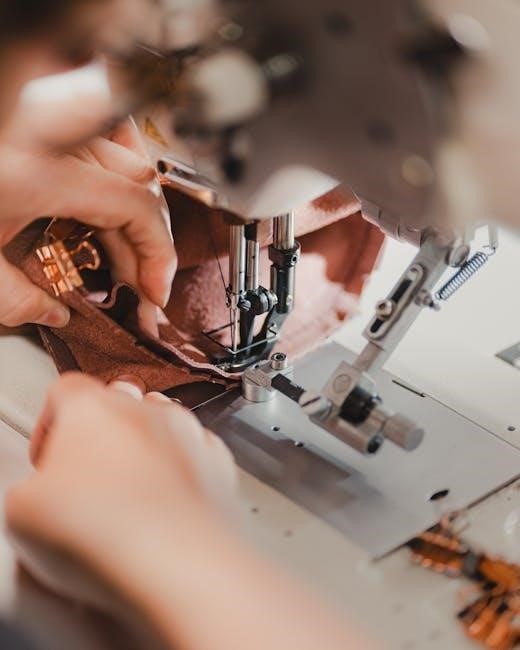
5.2. Using Presser Feet
Presser feet are essential for maintaining fabric control during sewing. The Singer 5050C comes with a universal presser foot, suitable for general sewing. To attach or change presser feet, lift the lever located behind the presser foot and slide the foot onto the shank until it clicks. For screw-on presser feet, tighten securely with the provided screwdriver. Always align the presser foot with the edge of your fabric for even pressure. Use specialized feet like the zipper foot for precise stitching or the buttonhole foot for creating perfect buttonholes. Avoid using the wrong presser foot, as it may cause fabric dragging or uneven stitching. Regularly clean and inspect presser feet for damage. Replace worn-out feet to ensure optimal performance. Using the correct presser foot enhances stitching quality and makes sewing easier and more efficient. Experiment with different presser feet to explore various sewing techniques and projects.

Warranty and Support
The Singer 5050C Sewing Machine is backed by a limited warranty covering defects in materials and workmanship. For warranty details, visit the Singer official website or contact customer service. Additional support resources, including user manuals and troubleshooting guides, are available online to assist with any machine-related inquiries.
6.1. Warranty Information
The Singer 5050C Mechanical Sewing Machine is covered by a limited warranty provided by Singer. This warranty typically covers defects in materials and workmanship for a specified period, usually 1 to 2 years, depending on the region. The warranty applies to the machine head and electronic components, ensuring repair or replacement at no additional cost if issues arise under normal use. However, the warranty does not cover damage caused by misuse, improper maintenance, or accidental breakage. For detailed warranty terms, owners should refer to the official Singer website or contact their local Singer customer service. The warranty is non-transferable and valid only for the original purchaser. Proper registration of the machine may be required to activate warranty benefits. Always retain the purchase receipt and warranty documentation for verification purposes.
6.2. Customer Service and Resources
Singer offers comprehensive customer support for the 5050C sewing machine. Owners can access a variety of resources, including downloadable manuals, instructional videos, and troubleshooting guides on the official Singer website. For direct assistance, customers can contact Singer’s customer service team via phone, email, or live chat; Additionally, Singer provides a network of authorized service centers where users can seek professional help for repairs and maintenance. The Singer website also features a dedicated section for FAQs, addressing common queries about machine operation, maintenance, and warranty. Furthermore, Singer’s online community forums and social media platforms offer a space for users to share tips, resolve issues, and connect with fellow sewists. These resources ensure that users have ongoing support to maximize their sewing experience with the Singer 5050C.